The making of the Roland Junior-106
This page was created to show what can be done with a Roland Juno-106 if you have some time over. This is not intented to be a step-by-step guide on how to create your own Junior-106, but instead to briefly show how I created mine, together with some notes on caveats and cautions.
The Birth Of The Idea
After I moved together with my girlfriend, the space available for my home studio shrank from 10 square meters to a 2.8 sqm wardrobe. Size begun to be important. My Emulator2 and Emax2 had to go, keeping only the Roland JX-10 as a master keyboard. There was a 1 by 0.6 m spot left empty after furnishing the wardrobe though, but I couldn't decide on what to buy that would fit that space. An SH-101 would work, and a Virus P0lar surely, but being a former user of the Juno-106 it suddenly struck me that the controls on that one are placed nicely in the center of the unit, and maybe the Juno could be modified to fit into my free spot. Said and done, or rather thought and photoshopped, I created a mockup picture with Gimp:
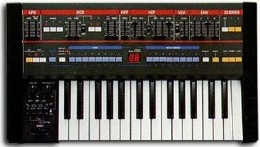
I liked the looks of it, like an SH-101, but sturdier and 6-poly :-)
So my mind was made up and the only thing I lacked was a Juno to treat with my hacksaw. About 3 months later (February 2006) I found one for a decent price (SEK 2500) and started to plan my operation.
Next: The disassembly